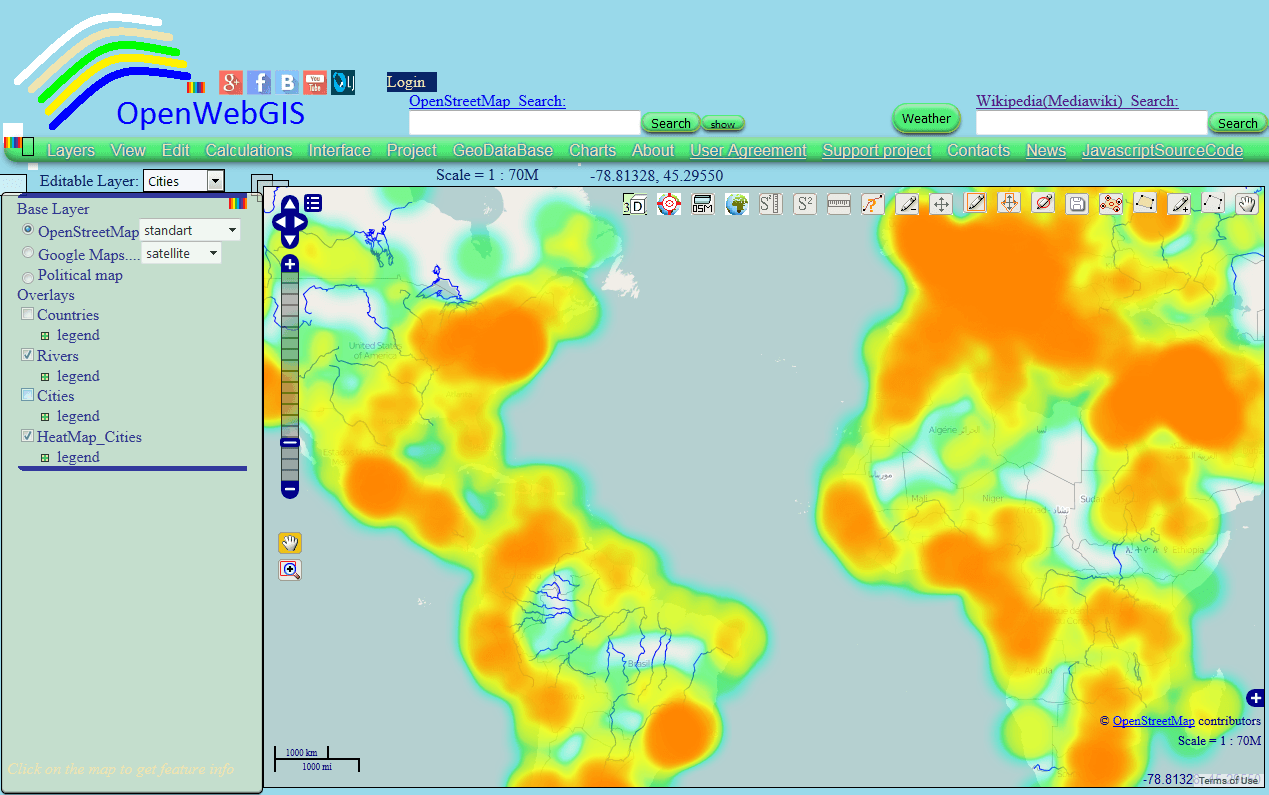
This article is a continuation of the article “Heatmap and Interpolation: it is easy in OpenWebGIS” about creation of Heatmap and Interpolation with the help of OpenWebGIS interface. We are now describing the process of creating a heatmap, based on any point layer, using JavaScript, OpenLayers 2.x and canvas element (as part of HTML5 technology). Describing the process we will expect that you certainly already have some basic knowledge of programming language JavaScript and can handle OpenLayers library (which is an open source provided under the 2-clause BSD License) JavaScript library for displaying map data in web browsers.). Perhaps the general principles of work with the OpenLayers 2.x library can be applied with some adjustments to the work with the OpenLayers 3.x library, if for example, while creating some new objects replace the “new OpenLayers” to “new ol”, but this is not tested and I have not put currently such a task. As for me, the author of OpenWebGIS, it is enough in my work to use OpenLayers 2.x. But adapting the entire project on the base of the OpenLayers 3.x library can be very labor-expensive.
Readers should take into account that the code itself is likely not perfect and of course there are better solutions. But this code really works and gives the desired result. So that it can be used as a base for creating your heatmap functions using any libraries and their versions. And you make it more optimal for your own tasks.
In your project the OpenLayers library should be added. To do this, write the row: <script src = “PATHto / OpenLayers.js”> </ script>, where instead of PATH to specify path to where you put the OpenLayers.js file.
First of all it is necessary to get all the elements of the layer that will be used to create a heatmap. To do this, the user must select the name of the layer (in this case select the layer “Cities”) with which we will work in the list of “Editable Layer” and click on the menu item “Calculations-> Interpolation”. When the user selects the layer name in the list of “Editable Layer”, in the code of OpenWebGIS the global variable “edilayerMainLayer” becomes equal to the layer and its contents. How it happens, you can look in the function SeteditlayerMain (editlayerM) in file “opengis_eng.html” if you download the javascript code using the menu item of OpenWebGIS “JavascriptSourceCode”.
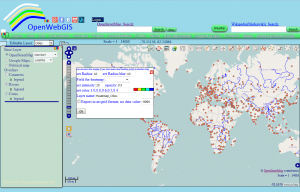
After the user selects the menu item “Calculations-> Interpolation”, the pop-up window will appear as shown in Figure 1. You can see the window creation code in the function Interpolation() inside the file “opengis_eng.html”.
The user selects the desired type of heatmap or interpolation and clicks “OK” button, after pressing this button function OK_Interpolation_First() fulfills. Inside this function the process redirection occurs to perform other functions, depending on the user’s choice. When selecting Heatmap, redirection to a HeatmapCanvas2() function occurs. In the HeatmapCanvas2() function the pop-up window construction happens with the options of creating Heatmap. Again, the code to create a window is not given here by us. You can examine it carefully in the file “opengis_eng.html”. The window will appear as shown in Figure 2.
It is only necessary to note that the “OK” button with the id = “okHeatmapOWG_id” is tied with the event onclick:
document.getElementById ("okHeatmapOWG_id").onclick=function(){var zoomH = 0; HeatmapCanvas (zoomH)}
The variable “zoomH” is necessary to indicate the fact that the layer is created with the heatmap results for the first time or it already exists and only needs to be recalculated and redrawn after the user performs zoom in or zoom out. If the layer is just created, then the zoomH variable is set to 0, if it is not so, then the zoomH variable becomes equivalent to a layer that is to be recalculated (we will write about it later).
The OpenWebGIS user has the ability to calculate a heatmap simply depending on the density of points or taking into account the value of the layer selected field (attribute) . Fields names are specified in the list (element select) with identificator id = “htmpselectatrowg_id”. With this in mind, the code will branch out.
So after clicking “OK” button in the pop-up window shown in Figure 2 the HeatmapCanvas(zoomH) function starts to run. The function start looks like this:
//create array for the points coordinates of our layer selected in the list of "Editable Layer":

var data = [];
if (zoomH == 0) // if the layer with the heatmap is created for the first time
{
// Create a new layer that will contain the heatmap.
//The layer name is taken from the value of the input element with id = "Id_HeatowgLayerNameAtl_Name",
// which was inserted by the user:
var new_layer_Heat = new OpenLayers.Layer (document.getElementById ("Id_HeatowgLayerNameAtl_Name"). value, {});
// Check the existence of the features:
if(edilayerMainLayer.features&&edilayerMainLayer.features[0]&&edilayerMainLayer.features[0].geometry&&edilayerMainLayer.features[0].geometry.CLASS_NAME=="OpenLayers.Geometry.Point")
{// Creating a new parser with the OpenLayers.Format.GeoJSON constructor:
var format = new OpenLayers.Format.GeoJSON ({'internalProjection': new OpenLayers.Projection ("EPSG: 900913"),'externalProjection': new OpenLayers.Projection ("EPSG: 900913")});
var jsonstringH = format.write (edilayerMainLayer.features);
// Create a "featuresH" array of source features for subsequent recalculation of the layer for zooming:
new_layer_Heat.featuresH = JSON.parse (jsonstringH) .features;
// looping over the whole array of features (points), recalculate their geographical coordinates
//in pixel coordinates on the map and add the result to an "data" array :
for (var i=0;i<new_layer_Heat.featuresH.length;i++)
{var pix = map.getPixelFromLonLat (new OpenLayers.LonLat(new_layer_Heat.featuresH[i].geometry.coordinates[0],new_layer_Heat.featuresH[i].geometry.coordinates[1]));
data.push ([pix.x, pix.y)]);}
}
else {alert ("No Vector Layer and no Point Layer. Select other Layer"); return;} }
Here, in the “map.getPixelFromLonLat” expression, “map” is an OpenLayers map object , created using the OpenLayers.Map function , “getPixelFromLonLat” – is a function of OpenLayers, its description is given here and the function OpenLayers.LonLat- is a function of OpenLayers, its description is given here.
If a layer with a heatmap already exists, i.e. zoomH is not equal to 0, then simply use a ready featuresH array there :
else
{for (var i = 0; i &lt;zoomH.featuresH.length; i ++)
{var pix = map.getPixelFromLonLat (new OpenLayers.LonLat(zoomH.featuresH[i].geometry.coordinates[0],zoomH.featuresH[i].geometry.coordinates[1]));
data.push ([pix.x, pix.y]);}
}
Next, create a canvas element to draw brush, size of which will correspond to the radius and blur set by the user
var brushCanvas = document.createElement ('canvas');
And create a gradient of colors, depending on the colors specified by the user. The color selection process is carried out by a user by means of clicking on the squares with colors, and then the color palette opens (as shown in Figure 3).
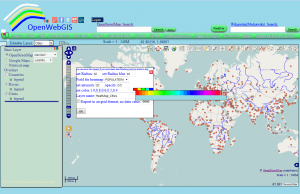
Each square represents the div element (with id equal from “color1Heatmp” to “color5Heatmp”) with colors corresponding to values of heatmap 1.0, 0.8, 0.6, 0.5, 0.4. The process of creating the color palette and color selection by the user is implemented in clickDivColor3d (elem) function, if you want, you can explore this function in the “opengis_eng.html” file.
Set the size of the brush and fix the colors selected by the user:
if(zoomH==0)
{
// Set the brush radius to paint on the canvas:
var brushSize = parseFloat(document.getElementById("Id_radHeatowgLayerNameAtl").value);
// Set the size of the brush blur for painting on canvas:
var brushBlurSize = parseFloat(document.getElementById("Id_blurHeatowgLayerNameAtl").value);
// save the colors, opacity, intensity in the "heatmapparams"
//layer object new_layer_Heat as the "properties" JavaScript Objects:
new_layer_Heat.heatmapparams = {brushSize: brushSize, brushBlurSize: brushBlurSize,
color1:document.getElementById("color1Heatmp").style.backgroundColor,
color2:document.getElementById("color2Heatmp").style.backgroundColor,
color3:document.getElementById("color3Heatmp").style.backgroundColor,
color4:document.getElementById("color4Heatmp").style.backgroundColor,
color5: document.getElementById ("color5Heatmp"). style.backgroundColor,
opacity: parseFloat(document.getElementById("Id_opasHeatowgLayerNameAtl").value),
intense: parseFloat(document.getElementById("Id_intenHeatowgLayerNameAtl").value)
}
}
else
{var brushSize = zoomH.heatmapparams.brushSize;
var brushBlurSize = zoomH.heatmapparams.brushBlurSize;}
// Set brush size:
var r = brushSize + brushBlurSize;
var d = r * 2;
brushCanvas.width = d;
brushCanvas.height = d;
Get the context of the brushCanvas canvas:
var ctx3 = brushCanvas.getContext ('2d');
// draw our brush:
ctx3.shadowOffsetX = d;
ctx3.shadowBlur = brushBlurSize;
ctx3.shadowColor = 'black';
// Draw circle in the left to the canvas:
ctx3.beginPath ();
ctx3.arc (-r, r, brushSize, 0, Math.PI * 2, true);
ctx3.closePath ();
ctx3.fill ();
For a better understanding of heatmap drawing in the canvas element using javascript without regard to OpenLayers, I advise you to read this article here – in my view, it is one of the most visual articles on this topic. After everything will be understood that is shown there, it will be more clear what is described in the our article above and below.
// Create a canvas in which there will be the whole heatmap:
var brushCanvasF = document.createElement ('canvas');
// Set the size of this canvas according to the size of the map:
brushCanvasF.width=document.getElementById("map").style.width.split('px')[0];
brushCanvasF.height=document.getElementById("map").style.height.split('px')[0];
Get the context of the brushCanvasF canvas:
var ctx = brushCanvasF.getContext ('2d');
// The code below is triggered if the user specified the field
//of the attributes of a point layer to build a heatmap:
if (zoomH == 0) {if (document.getElementById ("htmpselectatrowg_id").value! == 0)
{var minDistC = parseFloat(new_layer_Heat.featuresH[0].properties[document.getElementById("htmpselectatrowg_id").value]);
// calculate the maximum and minimum values of the field selected by the user:
var maxDistC=parseFloat (minDistC);
for (var ia=1; ia <new_layer_Heat.featuresH.length; ++ ia)
{var NumSS=new_layer_Heat.featuresH[ia].properties[document.getElementById("htmpselectatrowg_id"). value];
if (NumSS>parseFloat(maxDistC))
{maxDistC=parseFloat(NumSS);}
if(NumSS <parseFloat(minDistC)) {minDistC = parseFloat (NumSS);}}}}
else
{if (zoomH.featuresH [0])
{
if (zoomH.heatmapparams.attribute)
{var minDistC=parseFloat(zoomH.featuresH [0].properties[zoomH.heatmapparams.attribute]);
var maxDistC=parseFloat(minDistC);
for (var ia=1; ia<zoomH.featuresH.length; ++ia)
{var NumSS=zoomH.featuresH [ia].properties[zoomH.heatmapparams.attribute];
if (NumSS> parseFloat(maxDistC))
{maxDistC=parseFloat(NumSS);}
if (NumSS <parseFloat(minDistC))
{minDistC=parseFloat (NumSS);}
}}}
}
Start directly the process of drawing a heatmap:
var len = data.length;
//loop over all points of the layer on the base
// of which a heatmap is created:
for (var i = 0; i <len; i ++) {
var p = data [i];
var x = p [0];
var y = p [1];
if (zoomH == 0)
{var alpha = parseFloat (new_layer_Heat.heatmapparams.opacity);
if (!new_layer_Heat.heatmapparams.opacity) {var alpha = 0.5;}}
else {var alpha = parseFloat (zoomH.heatmapparams.opacity);
if (!zoomH.heatmapparams.opacity) {var alpha = 0.5;}}
// Draw with the circle brush with alpha:
ctx.globalAlpha = alpha;
if (zoomH == 0)
{
if (document.getElementById ("htmpselectatrowg_id"). value == 0)
// Draw using the drawImage function
//(http://www.w3.org/TR/2dcontext/#dom-context-2d-drawimage):
{ctx.drawImage (brushCanvas, x - r, y - r);}
else
{
// calculate the heatmap intensity
//(see more about this in a previous
//article https://digital-geography.com/heatmap-interpolation-easy-openwebgis):
new_layer_Heat.heatmapparams.attribute = document.getElementById ("htmpselectatrowg_id"). value;
var intens=20;
if(!new_layer_Heat.heatmapparams.intense)
{intens=20;}
else
{intens=new_layer_Heat.heatmapparams.intense;}
var xfeat=(parseFloat(new_layer_Heat.featuresH[i].properties[document.getElementById("htmpselectatrowg_id").value])*100)/maxDistC;
var inowh = Math.abs (Math.round(xfeat)/intens);
if (inowh == 0){inowh = 1;}
for (var t = 0; t<inowh; t++)
{ctx.drawImage (brushCanvas, x - r, y - r);}
}
}
else
{if (zoomH.featuresH [0])
{if (!zoomH.heatmapparams.attribute)
{ctx.drawImage (brushCanvas, x - r, y - r);}
else
{var intens = 20; if (!zoomH.heatmapparams.intense) {intens = 20;}
else {intens = zoomH.heatmapparams.intense;}
var xfeat=(parseFloat(zoomH.featuresH[i].properties[zoomH.heatmapparams.attribute])*100)/maxDistC;
var inowh=Math.abs(Math.round(xfeat)/intens);
if(inowh==0){inowh = 1;}
for (var t=0; t<inowh; t++) {ctx.drawImage(brushCanvas, x - r, y - r);}
}
} }
}
Start to create the color gradient as one pixel (by the width) canvas:
var levels = 256;
var canvas = document.createElement ('canvas');
canvas.width = 1;
canvas.height = levels;
var ctx2 = canvas.getContext ('2d');
if (zoomH == 0)
{var gradientColors = {
"0.4": document.getElementById("color1Heatmp").style.backgroundColor,
"0.5": document.getElementById("color2Heatmp").style.backgroundColor,
"0.6": document.getElementById("color3Heatmp").style.backgroundColor,
"0.8": document.getElementById("color4Heatmp").style.backgroundColor,
"1.0": document.getElementById("color5Heatmp").style.backgroundColor
};
addLegendHeatmap(gradientColors, new_layer_Heat.name);}
else
{
var gradientColors = {
"0.4": zoomH.heatmapparams.color1,
"0.5": zoomH.heatmapparams.color2,
"0.6": zoomH.heatmapparams.color3,
"0.8": zoomH.heatmapparams.color4,
"1.0": zoomH.heatmapparams.color5
}
addLegendHeatmap (gradientColors, zoomH.name);
}
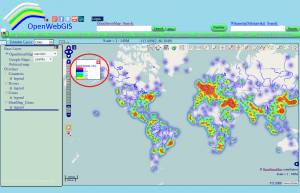
Function addLegendHeatmap(gradientColors, zoomH.name) creates a pop-up window with the heatmap legend. The legend created with the help of this function looks as shown in Figure 4. Its code (function addLegendHeatmap (gradientColors, name)) you can also see in the file “opengis_eng.html”
Then colour our heatmap. For a good understanding of the process, which is described below, please read carefully the documentation of the functions createLinearGradient, addColorStop, getImageData and putImageData.
// Add color to gradient stops:
var ctx2.createLinearGradient gradient = (0, 0, 0, levels);
for (var pos in gradientColors)
{gradient.addColorStop (pos, gradientColors [pos]);}
ctx2.fillStyle = gradient;
ctx2.fillRect (0, 0, 1, levels);
var gradientPixels = ctx2.getImageData(0, 0, 1, levels) .data;
var imageData = ctx.getImageData(0, 0, brushCanvasF.width, brushCanvasF.height);
var pixels = imageData.data;
var len = pixels.length/4; var strhorexport = ''; var indcol = brushCanvasF.width;
If the user has activated the option of “Export in arcgrid format” (the checkbox element with id = “Heat_export_interpowg”), the ArcGrid ASCII file is formed. exportGridOWG – a global variable, equal to 0 by default. This variable is used in the ExportFileAsc2() function, which is triggered if the user wants to export previously created and already existing on the map Layer heatmap to ArcGrid. This function is used when the user selects the menu item “Edit-> Export in ArcGrid format”:
// So if the user has activated the «Export in arcgrid format" option :
if((document.getElementById("Heat_export_interpowg")&&document.getElementById("Heat_export_interpowg").checked==true)||(document.getElementById("Expgrselectatrowg_id")&&exportGridOWG==1)){if(document.getElementById("Expgrselectatrowg_id")&&exportGridOWG==1)
{newnoval=document.getElementById("Id_noExgrtowgLayerName_val").value}
else{newnoval=document.getElementById("Id_noHeatowgLayerName_val").value} }
// set pixel by pixel colors of a heatmap:
while (len--) {
var id = len*4+3;
var alpha = pixels[id]/256;
var colorOffset = Math.floor(alpha*(levels - 1));
pixels [id - 3] = gradientPixels[colorOffset*4]; // Red
pixels [id - 2] = gradientPixels[colorOffset*4+1]; // Green
pixels [id - 1] = gradientPixels[colorOffset*4+2]; // Blue
We continue to generate ArcGrid file (if the user have specified this option) in accordance with the standart:
if((document.getElementById("Heat_export_interpowg")&&document.getElementById("Heat_export_interpowg").checked==true)||(document.getElementById("Expgrselectatrowg_id")&&exportGridOWG==1))
{if (alpha==0) {alpha=newnoval;} indcol -;
if (indcol== 0)
{if (len == 0)
{strhorexport= alpha + "" + strhorexport;}
else {strhorexport= "n "+alpha+" "+strhorexport;}
indcol = brushCanvasF.width;}
else {if (indcol == brushCanvasF.width-1)
{strhorexport = alpha + strhorexport;}
else {strhorexport = alpha + "" + strhorexport;}}
}
}
if((document.getElementById("Heat_export_interpowg")&&document.getElementById("Heat_export_interpowg").checked==true)||(document.getElementById("Expgrselectatrowg_id")&&exportGridOWG==1))
{
var georef = map.calculateBounds ();
// calculateBounds - is a function of OpenLayers, read about it here:
//http://dev.openlayers.org/docs/files/OpenLayers/Map-js.html#OpenLayers.Map.calculateBounds.
//read about the function of OpenLayers transform here:
//http://dev.openlayers.org/docs/files/OpenLayers/BaseTypes/Bounds-js.html#OpenLayers.Bounds.transform
georef.transform (map.getProjectionObject(), new OpenLayers.Projection("EPSG: 4326"));
var lat1 = georef.bottom; var lat2 = georef.top;
var long1 = georef.left; var long2 = georef.right ;
if (lat2>lat1)
{var slat = Math.abs (lat2-lat1)/map.size.h;}
else
{var slat = Math.abs(lat1-lat2)/map.size.h;}
if (long2>long1)
{var slon = Math.abs(long2-long1)/map.size.w}
else {var slon=Math.abs(long1-long2)/map.size.w}
if (slon==slat) {var cellz = "rnCELLSIZE" + slat;}
else {var cellz = "rnDX" + slon + "rnDY" + slat} /// map.size. h;
var dops = "NCOLS" + brushCanvasF.width+"rnNROWS"+brushCanvasF.height+
"rnXLLCORNER"+long1+"rnYLLCORNER"+lat1+cellz+"rnNODATA_VALUE"+newnoval+"rn "
// KmlText2 is a global variable to display the contents of the exported file
// in textarea (link) of a download.html page .
// For a better understanding of the process, learn the code in a download.html file.
// It can be downloaded with the "opengis_eng.html" file :
kmlText2 = dops+strhorexport;
myWinExport=open("download.html", "Export arcgrid", "width=900, height=500, status=no, toolbar=no, menubar=no, scrollbars=yes");
myWinExport.focus ();
}
// complete the drawing of colored heatmap:
ctx.putImageData (imageData, 0, 0);
At the end add the formed canvas with the heatmap in the div element of the layer new_layer_Heat.
If the layer is new, ie zoomH==0, then just add, if not, then remove the previous canvas via standard removeChild function and add newly created and designed canvas.
Finally align canvas in the edges of the map, using properties such as style.top and style.left of map.layerContainerDiv
if (zoomH == 0)
{
new_layer_Heat.heatmapOWG = "yes";
// addLayer function is a function of Openlayers
//http://dev.openlayers.org/docs/files/OpenLayers/Map-js.html#OpenLayers.Map.addLayer

map.addLayer (new_layer_Heat); new_layer_Heat.div.appendChild (brushCanvasF);
new_layer_Heat.div.style.left=((-1)*parseInt(map.layerContainerDiv.style.left,10))+"px";
new_layer_Heat.div.style.top=((-1)*parseInt(map.layerContainerDiv.style.top,10))+"px";
}
else
{zoomH.div.removeChild(zoomH.div.childNodes[0]);zoomH.div.appendChild(brushCanvasF);
zoomH.div.style.left=((-1)*parseInt(map.layerContainerDiv.style.left,10))+"px";
zoomH.div.style.top=((-1)*parseInt(map.layerContainerDiv.style.top,10))+"px";}
An important point: when zoom in, zoom out and move of the map the OpenLayers events trigger “zoomend” and “moveend”. They are used for the recalculation and redrawing a heatmap. Code of these events in OpenWebGIS is shown below. From the code it is clear, that every time they activate (trigger) the HeatmapCanvas functions to create a heatmap. And also the function IDWCanvas2 is activated for constructing of Inverse Distance Weighting (IDW) interpolation. You will learn about the Construction of Inverse Distance Weighting (IDW) in the next article.
map.events.register ("moveend", map,
function () {
if (mapCenterPan.length<2)
{MapCenterPan.push (map.getCenter ());}
else
{var w = mapCenterPan [1]; mapCenterPan = [];
mapCenterPan.push (w);
mapCenterPan.push (map.getCenter ());}
for (var i = 0; i <map.layers.length; i ++)
{if (map.layers [i] .heatmapOWG)
{var zoomH=map.layers[i];HeatmapCanvas(zoomH);}
if(map.layers[i].IDWOWG&&map.layers[i].visibility==true)
{var zoomIDW = map.layers [i]; IDWCanvas2 (zoomIDW);}}
});
map.events.register ("zoomend", map, function ()
{if(map.zoom>30&&map.zoom<=35)
{external_control.numDigits=10;}
if(map.zoom>35)
{external_control.numDigits=14;}
if(gsat=='')
{document.getElementById("tableAlertWait").style.display="none";
return;};
if(gsat==map.baseLayer)
{if(!document.getElementById("tableAlertWait"))
{document.getElementById("tableAlertWait2").style.display="block";}}
if (mapCenterZoom.length <2)
{mapCenterZoom.push (map.zoom);}
else {var w = mapCenterZoom [1]; mapCenterZoom = [];
mapCenterZoom.push (w); mapCenterZoom.push (map.zoom);}
for (var i = 0; i <map.layers.length; i ++)
{if(map.layers[i].CLASS_NAME=="OpenLayers.Layer.Image")
{map.layers[i].div.childNodes[0].style.display="block";}
});
